
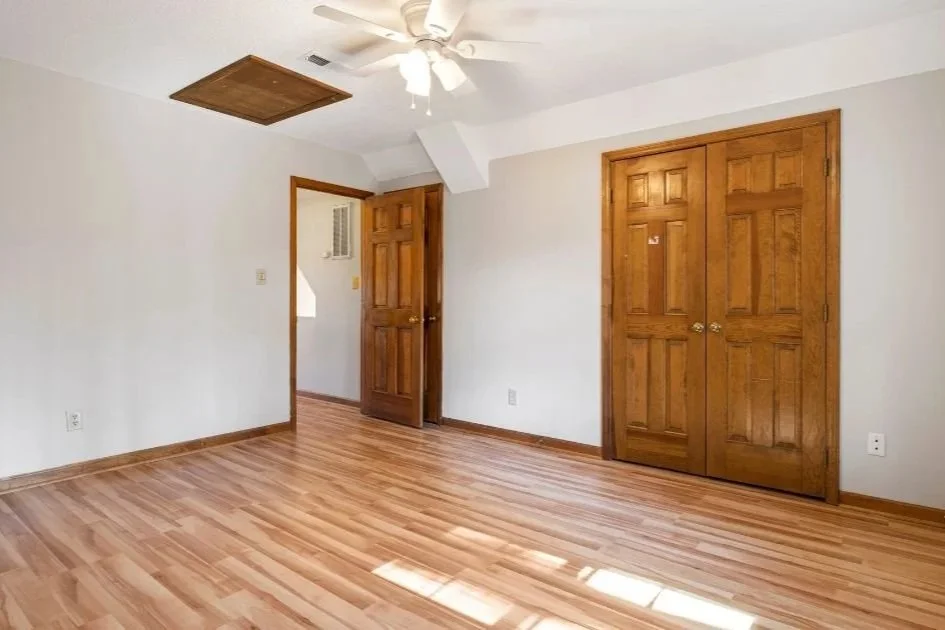
A beautiful hardwood floor can make separate rooms feel like one thoughtfully designed home. But when new flooring meets existing wood, even a small transition can expose the difference between careful craftsmanship and a remodel that was simply pieced together.
Homeowners often notice the obvious details first: the species of wood, the stain color, or the width of the boards. A skilled builder is looking several steps deeper. We are studying floor height, board direction, subfloor flatness, moisture conditions, expansion requirements, milling profiles, finish compatibility, and where the transition will fall within the homeowner’s natural line of sight.
Those details matter because a wood floor transition is more than a decorative joint. It has to accommodate movement, withstand years of foot traffic, and create a visual connection between two surfaces that may have been installed decades apart.
At Morganco Design Build, we approach flooring transitions as part of the architecture of the room. The goal is to make the connection structurally sound, visually balanced, and appropriate for the home. Sometimes that means making the transition nearly disappear. Other times, the better design decision is to create an intentional dividing line that looks deliberate rather than disguised.
Here is how those decisions are made and what homeowners should know before joining two wood floors.
How Do You Join Two Wood Floors Cleanly?
The cleanest way to join two wood floors is to select a transition method that accounts for the flooring construction, board direction, floor height, wood species, and natural movement of both floors. When compatible hardwood floors meet at the same elevation, weaving new boards into the existing floor can create the most seamless appearance. When the floors differ in direction, height, species, or installation type, a properly designed header board, wood threshold, T-molding, or reducer often produces the cleaner and more durable result.
There is no single transition detail that is right for every house.
The most refined solution begins before flooring installation. We determine what the eye should see, what the flooring needs structurally, and how that joint will perform through St. Louis summers and winters.
A transition that photographs beautifully on installation day but opens, buckles, squeaks, or shifts a year later is not quality workmanship.
Start by Choosing the Right Type of Transition
The first decision is determining how closely the two floors can realistically be integrated.
If both areas contain the same species, thickness, board width, and installation method, we may be able to lace the new hardwood into the old. Instead of creating one straight seam, selected existing boards are removed at staggered lengths. New boards are then fitted into those openings.
The resulting joint is dispersed across several rows rather than concentrated along one obvious line.
This process is often called weaving, feathering, or toothing in hardwood flooring.
Done well, your eye follows the grain of the floor instead of finding the place where the remodeling project began.
If the materials are substantially different, attempting to hide that difference can have the opposite effect. A 2¼-inch traditional red oak floor next to a wide-plank white oak floor, for example, is not going to become visually identical because the stain colors are close.
That may be the perfect place for an intentional header board.
The header creates a crisp architectural break. One flooring pattern ends cleanly, the header establishes the transition, and the second material begins.
Instead of apologizing for the difference, the design organizes it.
Decide Between a Seamless Transition and an Intentional Break
A good flooring transition does not necessarily mean an invisible transition.
That distinction is important.
Imagine opening a kitchen into a dining room with matching oak hardwood on both sides. If the floor elevations and board dimensions cooperate, integrating the boards can reinforce the new open layout. A threshold across the old doorway could unnecessarily remind everyone that the rooms were once separated.
Now consider an addition adjoining an older portion of the home. Perhaps the original floor has developed decades of character while the new space uses wider boards and a slightly different species.
Trying to imitate every mark and color variation can leave the new floor looking like an imperfect copy.
An intentional dividing board often looks more sophisticated because it acknowledges the architecture.
The best transition should make sense even to someone who never knew the house was remodeled.
That is the standard we work toward.
Why Wood Floor Transitions Require Careful Planning
Hardwood is a natural material. It expands, contracts, changes color, and responds to the environment around it.
Those characteristics are part of its beauty, but they are also why flooring details require more precision than they sometimes receive.
READ: Guide To Hardwood Floor Refinishing in St. Louis
Wood Movement and Seasonal Humidity
Wood flooring changes dimension as the moisture content of the material changes.
For homeowners in St. Louis, that matters because our homes experience significant differences between humid summer conditions and dry winter interiors. Heating and cooling systems help regulate the environment, but hardwood still needs to be installed with its natural movement in mind.
A transition cannot simply be locked together as tightly as possible.
Depending on the flooring system, proper perimeter or transition expansion space may need to remain concealed beneath trim or a transition component. Floating flooring systems have especially specific movement requirements because the floor must be allowed to move as a unit.
Traditional nail-down hardwood behaves differently.
Understanding those differences before connecting two floors helps prevent problems such as cupping, buckling, separating joints, or cracked transition pieces.
Subfloor Conditions and Floor Height
A beautiful transition starts underneath the finished material.
If one room has ¾-inch hardwood over plywood while an adjoining area has thinner flooring, additional underlayment, or a different subfloor assembly, the finished elevations may not line up.
A rushed installation tries to solve that problem at the doorway.
A carefully planned remodel addresses as much of the difference as possible below the flooring.
We may evaluate the joists, subfloor thickness, underlayment, existing layers, and flooring profile before determining the finished elevation.
Correcting a ¼-inch discrepancy across an entire floor assembly can produce a much more elegant result than trying to conceal the same discrepancy in a two-inch-wide transition strip.
Board Direction and Sightlines
Board direction affects both appearance and installation.
Hardwood often looks most natural when its orientation responds to the room proportions, framing structure, existing flooring pattern, and major architectural sightlines.
When a remodel removes walls, those sightlines change.
Imagine standing at the entry of a newly opened kitchen and looking through the dining room toward the family room. A flooring transition that seemed minor when examined from three feet away may become a prominent horizontal line extending across the entire view.
That is why we study flooring layout in relation to the whole room.
The point where two floors meet should reinforce the architecture, not interrupt it.
The Best Ways to Transition Between Two Wood Floors
Several proven methods can create a professional transition. The right solution depends on what the two floors are asking us to solve.
Weaving or “Toothing In” New Hardwood
When homeowners want the most seamless wood floor transition possible, weaving is often the first option we consider.
Instead of cutting the existing flooring into a straight line, boards are carefully removed at staggered locations. New boards extend into the existing field at different lengths.
There is no single joint announcing, “the new floor starts here.”
This technique works especially well when:
The new and existing hardwood are compatible in species and thickness.
Board widths match closely.
Both floors can be installed at the same elevation.
The existing flooring is sound enough to remove and modify selectively.
Refinishing the connected areas is part of the project.
The workmanship involved is significant.
Existing boards must be removed without causing unnecessary damage to the surrounding floor. Tongue-and-groove connections may need to be modified thoughtfully. Replacement pieces must fit tightly while still respecting how the floor needs to move.
After installation, sanding and finishing help visually unify the old and new material.
When all of those pieces come together, it can be difficult for someone unfamiliar with the project to identify where one floor ends and the other begins.
Using a Header Board or Feature Strip
A header is one of our favorite solutions when a completely invisible transition is either impractical or undesirable.
Instead of running the two fields of flooring directly into each other, one board or a carefully proportioned group of boards crosses the opening.
Think of it as punctuation.
The header clearly ends one flooring layout and gives the adjoining layout a clean place to begin.
It can be particularly effective where flooring direction changes by 90 degrees.
Without the header, dozens of board ends may meet the long edge of another floor. Even precise workmanship can make that connection visually busy.
A header simplifies the geometry.
The key is proportion and placement. The board should look like a deliberate part of the design, not a leftover piece used to cover a problem.
Installing a Wood Threshold
Traditional wood thresholds still have a place in quality remodeling.
They are especially appropriate when two distinct rooms need a defined separation, when flooring materials cannot be woven together, or when a doorway naturally provides a transition point.
A custom wood threshold can often be milled to fit the exact conditions rather than relying on a generic off-the-shelf profile.
That lets us control its width, slope, wood species, edge detail, and finish.
In a home with strong traditional detailing, that type of craftsmanship can feel far more appropriate than a manufactured transition strip.
Using T-Molding Between Wood Floors
T-molding covers an expansion gap between two floors that are at approximately the same height.
Viewed in profile, it resembles a “T.” The vertical portion fits into the gap while the upper portion overlaps both flooring edges.
This is common with engineered and floating flooring systems because those products often require movement space that cannot simply be eliminated for appearance.
T-molding can be installed cleanly, but we do not automatically use it simply because two floors meet.
If the construction allows for a more integrated detail, we consider that first.
The transition should serve the flooring system rather than become a shortcut for avoiding careful layout.
Using a Reducer for Uneven Floor Heights
A reducer gradually transitions from a higher floor to a lower floor.
When properly designed, it creates a controlled slope instead of an abrupt step.
This may be necessary when an existing room and remodeled room use different flooring assemblies that cannot reasonably be brought to exactly the same elevation.
The goal is always to make the transition feel intentional and comfortable underfoot.
A bulky reducer placed on top of an avoidable floor-height problem is very different from a carefully milled reducer used because the underlying conditions genuinely require one.
How We Plan Wood Floor Transitions During a St. Louis Remodel
A flooring transition is easiest to execute beautifully when it is considered during design rather than discovered during installation.
That is one of the advantages of an integrated design-build process.
Flooring is considered alongside walls, cabinetry, door openings, stairs, structural changes, and room proportions rather than treated as an isolated finish selection at the end.
Inspect the Existing Hardwood Before Design Begins
We begin with the floor that is already there.
We want to know:
What kind of wood is it?
How wide are the boards?
How thick is the remaining wear layer?
Is the flooring solid or engineered?
How was it fastened?
Is it flat and structurally sound?
Has it been refinished before?
Are there damaged areas?
Is there evidence of moisture?
What is underneath it?
A floor may look perfectly serviceable from above while the assembly underneath tells another story.
Older St. Louis homes can also contain flooring from different eras within the same house. A room that appears original may have been renovated decades after the home was constructed.
We would rather discover that while planning than after demolition.
Identify the Natural Breaks Between Rooms
Architecture gives us clues about where flooring should change.
Doorways are obvious candidates, but they are not the only ones.
Changes in ceiling height, cabinetry, structural beams, cased openings, kitchen islands, fireplaces, and room orientation can all help establish a logical transition line.
In an open floor plan, the cleanest location may not be where the old wall stood.
If the wall is disappearing, the flooring should usually support the new architecture instead of preserving the visual footprint of something that no longer exists.
Check Moisture, Acclimation, and Subfloor Conditions
Installing hardwood responsibly requires attention to moisture conditions.
New material should be appropriate for the environment in which it will be installed, and the building conditions need to support the flooring manufacturer's requirements.
We also pay close attention to the subfloor.
Flooring is a finish material. It should not be expected to correct structural movement, significant unevenness, or inappropriate substrate conditions.
If a floor is crowned, sagging, loose, or inconsistent, those issues need to be understood before beautiful hardwood goes over the top.
Lay Out the Flooring Before the First Board Is Fastened
Few things make craftsmanship more visible than flooring layout.
A small adjustment to the starting position can determine whether the opposite side of a room finishes with a balanced board or an awkward one-inch sliver.
The same principle applies to transitions.
Before committing to the installation, we consider how the boards will intersect door openings, cabinetry, stairs, walls, and the existing floor.
That planning is invisible once the project is finished.
The result is not.
How a Clean Wood Floor Transition Is Installed
The exact installation varies by flooring type, but the fundamentals remain consistent: establish sound conditions, make precise cuts, maintain the correct geometry, and finish the joint as carefully as the rest of the floor.
Step 1: Prepare the Existing Flooring
If the new floor is being woven into old hardwood, selected existing boards must first be removed.
That is careful demolition.
The objective is not simply to remove enough flooring to create space. It is to preserve the boards and subfloor that are staying.
Cuts need to land exactly where intended. Adjacent tongues, grooves, and finished surfaces should remain intact whenever possible.
A few minutes of aggressive demolition can create hours of unnecessary repair.
Step 2: Correct the Subfloor
Next, we prepare the substrate.
Loose panels can create squeaks. High points can telegraph through the finished floor. Low areas can allow movement. Inconsistent elevation can become an obvious ridge at the transition.
Corrections made at this stage create the foundation for everything homeowners will see later.
This is also the time to confirm finished floor heights.
Once the hardwood is down, it is too late to discover that the adjoining room is ⅜ inch higher than anticipated.
Step 3: Dry-Lay and Align the New Boards
Before permanent fastening, we check the visual relationship between the old and new flooring.
Board widths should align where necessary. Stagger patterns should look natural. End joints should not unintentionally create obvious repeating lines.
For woven flooring, individual board lengths can be selected to make the integration look convincingly random.
The transition should appear like part of the floor, not a patch.
Step 4: Cut the Transition Precisely
Woodwork rewards accuracy.
A straight transition needs to be genuinely straight. A header board needs consistent joints along its full length. A threshold should fit its opening cleanly instead of relying on filler to disguise a poor cut.
Where walls, jambs, or trim intersect the flooring, those relationships require equal attention.
Caulk and wood filler have appropriate uses.
Correcting inaccurate craftsmanship should not be one of them.
Step 5: Fasten the Flooring Without Restricting Movement
Hardwood needs secure fastening, but it also needs to behave as the flooring system was designed to behave.
Solid nail-down hardwood, glue-assisted installations, engineered flooring, and floating systems all have different requirements.
The fastening and transition detail need to be compatible with that construction.
This is one reason an attractive photograph of a flooring transition does not tell the complete story.
Quality is as much about what has been done underneath as what is visible on top.
Step 6: Sand, Stain, and Finish the Transition
When new unfinished hardwood is being integrated with an existing site-finished floor, sanding and refinishing can create remarkable continuity.
But matching is a craft of its own.
We look at how the wood absorbs stain, how different boards respond to sanding, how the color appears under the home's lighting, and how the finish changes the depth and warmth of the final tone.
Sample preparation matters.
The final decision should be made based on how the actual material behaves, not simply by selecting a color name from a stain chart.
How to Match New Hardwood to an Existing Wood Floor
Homeowners often assume the goal is finding “the same brown.”
Color is only part of the equation.
A convincing match begins with the material itself.
Match the Species Before Chasing the Stain Color
Red oak and white oak, for example, can be stained into similar color families, but their grain characteristics are different.
Maple responds differently again.
If two species have noticeably different grain structures, forcing the stain colors to match perfectly may actually emphasize the difference.
Whenever a seamless transition is the goal, identifying the existing species is one of the first steps.
Pay Attention to Board Width, Grade, and Milling
Two oak floors can still look unrelated if one has narrow boards with prominent grain variation and the other uses wide, highly uniform planks.
Board width establishes rhythm.
Grade affects the amount of color variation, knots, mineral streaking, and character.
Milling affects how the edges meet.
All three influence whether a transition feels natural.
In many older St. Louis homes, traditional strip flooring is part of the architectural character. Preserving that scale may create a far more convincing renovation than introducing an unrelated contemporary plank purely because it is fashionable.
Understand Why Old and New Wood May Take Stain Differently
A decades-old floor has a history.
It has been exposed to sunlight, foot traffic, cleaning products, previous finishes, environmental changes, and possibly earlier refinishing work.
New lumber has not.
Even two boards from the same species can absorb stain differently.
That is why experienced flooring work depends heavily on samples and judgment.
The objective is visual harmony, not a laboratory-perfect color formula.
Match Sheen and Finish, Not Just Color
Imagine two floors with almost identical stain color.
One has a soft satin finish. The other is highly glossy.
They will look different the moment light crosses the joint.
Finish sheen affects how we perceive color, grain, texture, scratches, and surface variation.
A truly integrated floor considers the complete finish system.
Wood Floor Transitions Between Rooms and Different Directions
The architecture surrounding a transition often determines the most appropriate detail.
Doorways and Hallways
Doorways naturally frame transitions.
When one room has flooring running perpendicular to a hallway, a header board beneath the door or within the opening can neatly terminate both patterns.
Placement matters.
Ideally, the change aligns logically with the doorway so that when a door is closed, each room appears to have its own complete floor.
Open-Concept Living Areas
Open layouts demand more restraint.
There may be no casing or wall to hide a flooring joint, so the transition becomes part of the main visual field.
Whenever possible, we aim for continuity.
If matching flooring can be woven together successfully, an open room is one of the places where that effort has the greatest visual payoff.
If materials differ substantially, a deliberate feature strip may provide the stronger design.
What we try to avoid is an arbitrary strip running across the middle of an otherwise continuous space.
Kitchens and Main-Floor Remodels
Kitchen remodeling frequently creates flooring-transition questions because cabinetry layouts and wall locations often change at the same time.
Suppose a kitchen is expanded into a former breakfast area.
Installing the flooring first without considering the new cabinetry could leave a transition line exposed in an awkward location. Designing the floor and cabinetry together lets us position joints where they make sense within the finished composition.
The same thinking applies when a kitchen opens to a family or dining room.
A quality remodel is not a collection of individually correct details.
The details need to work together.
Home Additions
Additions present another challenge because the new framing and existing house may have different floor assemblies.
Before choosing the transition profile, we study how those assemblies meet.
When the structure allows it, careful framing and subfloor planning can bring the finished hardwood surfaces onto the same plane.
That creates opportunities for much more refined flooring transitions.
The cleanest finish frequently starts months before the flooring installer enters the project.
What to Do When Two Wood Floors Are Different Heights
Different floor heights should be treated as a design and construction issue, not merely a trim problem.
Correct Height Differences at the Subfloor When Possible
If we know during design that one flooring system will finish lower than another, there may be opportunities to adjust the substrate.
The appropriate solution depends on the existing structure and the materials involved, but correcting the elevation across a broader area generally creates a better walking surface than concentrating the entire change at one narrow joint.
Every added layer also affects nearby conditions.
Doors, cabinetry, appliances, stairs, baseboards, and adjacent flooring all need to be considered.
That is why apparently small flooring decisions sometimes require whole-room thinking.
Use Reducers When a Flush Transition Is Not Practical
There are situations where making the floors perfectly flush would require disproportionate structural work or create other problems.
That is where a well-designed reducer earns its place.
A quality reducer is proportioned to the actual elevation change and selected to coordinate with the surrounding floor.
When custom fabrication is appropriate, it can be milled to create a gradual, elegant transition.
Avoid Creating a Trip Point
Comfort underfoot matters.
A hard vertical edge between two floors can become both visually awkward and physically unpleasant.
Transitions should be secure, smooth, and appropriate for normal traffic through the room.
This is especially important in major circulation paths and homes intended to support comfortable long-term living.
Common Wood Floor Transition Mistakes
A flooring transition occupies very little square footage, but mistakes there can attract attention every time someone walks through the room.
Forcing a Perfect Color Match
Trying to make fundamentally different materials look identical can create disappointing results.
Sometimes complementary is more convincing than counterfeit.
If an old floor has significant patina or a new floor uses a different grain pattern, accepting a subtle distinction and giving it a well-designed boundary may create a more sophisticated result.
Ignoring Expansion and Contraction
Removing necessary movement space because a tight joint “looks better” is not precision.
Precision means understanding what the material requires and designing the detail so those requirements are handled elegantly.
Using Molding Where a More Refined Solution Is Possible
Surface transition strips are useful when they solve a legitimate technical need.
They should not automatically be the answer to every flooring joint.
On a substantial remodel, we often have opportunities to coordinate subfloor elevations, flooring layouts, and material selections in ways that reduce the need for prominent transition pieces.
Making the Transition an Afterthought
This is perhaps the most common problem.
The demolition happens.
The walls move.
The cabinets are ordered.
The flooring is selected.
Only then does someone ask, “What happens right here?”
By then, several of the best solutions may no longer be practical.
We would rather resolve that detail on the plan.
Allowing Uneven Cuts or Inconsistent Gaps
Craftsmanship becomes especially visible at boundaries.
A slight variation across a large floor can disappear into the natural character of wood. An irregular ⅛-inch gap along a straight header board can stand out immediately.
Transitions deserve the same level of precision as cabinetry, trim, and fine millwork.
Should You Repair, Refinish, or Replace the Existing Floor?
Keeping existing hardwood can preserve character, reduce unnecessary demolition, and allow a renovation to feel connected to the original home.
But preservation should be based on the condition of the material, not sentiment alone.
When Existing Hardwood Is Worth Saving
Existing flooring is often a good candidate for integration when it remains structurally sound, has adequate material remaining for refinishing, and suits the new design.
Older strip oak, in particular, can be an asset in many St. Louis homes.
When a well-built floor has decades of service left, incorporating it thoughtfully can produce a renovation with authenticity that brand-new material alone cannot replicate.
When Replacement Creates the Better Long-Term Result
There are also times when saving the floor forces too many compromises.
Extensive damage, inappropriate repairs, severe movement, multiple incompatible flooring sections, or an unsuitable floor assembly may make replacement the more responsible option.
Replacing more flooring can also make sense when a major main-level remodel dramatically changes the circulation and room layout.
The question is not simply, “Can we save it?”
The better question is, “Will saving it contribute to the best finished home?”
What Determines the Complexity of a Hardwood Floor Transition?
The difficulty of joining two hardwood floors depends on far more than the length of the doorway.
A short transition can require significant craftsmanship if an old floor must be selectively dismantled and woven into new material. A much longer transition may be relatively straightforward if it uses a properly located header between two compatible surfaces.
Species, board width, flooring thickness, installation type, floor elevation, subfloor condition, existing finish, staining requirements, demolition access, and room geometry all influence the work involved.
That is why it is risky to evaluate flooring transitions only by square footage.
The transition is often where several trades and design decisions intersect.
Questions to Ask Before Joining New and Existing Hardwood Floors
Before the flooring plan is finalized, a homeowner should understand more than what color the new hardwood will be.
Ask how the new flooring will physically connect to the existing floor.
Ask if the finished elevations will be flush.
Ask whether the species, width, and profile of the existing boards can be matched.
Ask if the old floor needs to be refinished for the transition to look cohesive.
Ask where changes in board direction will occur.
Ask why a particular transition molding is being proposed and whether another method is technically possible.
Ask how movement and expansion requirements will be handled.
And most importantly, ask to see how the flooring transition relates to the entire remodeled layout.
A contractor who has thought through the detail should be able to explain not only what will be installed, but why that approach makes sense for your home.
Some of the finest craftsmanship in a remodeling project is easy to miss.
That is often the point.
You may never consciously notice that a header board is perfectly centered beneath a doorway. You may not know how many existing boards were carefully removed to weave new oak into a seventy-year-old floor. You may never see the subfloor adjustments that allowed two rooms to finish at precisely the same elevation.
You simply walk through the home and everything feels right.
That sense of continuity comes from hundreds of small decisions made with care.
At Morganco Design Build, we believe flooring transitions deserve that level of attention because they represent something larger about a remodel. New construction has to meet the existing home somewhere. The quality of that connection determines whether the finished project feels added on or thoughtfully integrated.
As a third-generation builder serving Greater St. Louis, our approach is rooted in craftsmanship, careful planning, and respect for the homes entrusted to us. We look closely at the details because homeowners live with those details every day.
If your remodel involves connecting new hardwood to an existing floor, changing room layouts, opening walls, or building an addition, the flooring transition should be discussed early in the design process.
Done properly, it will not feel like a problem that had to be solved.